
by Tanya Keam | Feb 12, 2015 | Acidic, Alkaline, Chinese medicine, Client information, Cultures, Daily Rituals, DIY Wellness Tips, Fermented, Food, Gut flora, Immune Support, Kombucha, Nourishing, Nutrition, Parasites, Probiotic drink, Sunshine coast
What is gut flora?
Gut flora (microbiota) is the name given today to the microbe population living in our intestines. It contains tens of trillions of micro-organisms, including at least 1000 different species of known bacteria with more than 3 million genes (150 times more than human genes). Microbiota can, in total, weigh up to 2 kg. One third of our gut microbiota is common to most people, while two thirds are specific to each one of us. In other words, the microbiota in your intestine is like an individual identity card.

Why is it important?
While each of us has a unique microbiota, it always fulfils the same physiological functions and they have a direct impact on our health:
•It helps the body to digest certain foods that the stomach and small intestine have not been able to digest.
•It helps with the production of some vitamins (B and K).
•It helps us combat aggressions from other microorganisms, maintaining the wholeness of the intestinal mucosa.
•It plays an important role in the immune system, performing a barrier effect.
•A healthy and balanced gut microbiota is key to ensuring proper digestive functioning.
What does pH in the body mean?
pH stands for power of hydrogen, which is a measurement of the hydrogen ion concentration in the body. The total pH scale ranges from 1 to 14, with 7 considered to be neutral. A pH less than 7 is said to be acidic and solutions with a pH greater than 7 are basic or alkaline.
How does this affect our health?
When we eat acid-forming foods, our body works to bring our blood pH back into balance by releasing alkaline-rich minerals into our bloodstream (e.g. calcium, phosphorus and magnesium).
If we are not eating enough alkaline-forming foods, then our body has to pull these minerals from our bones, teeth and organs. This can compromise our immune system, cause fatigue and make us vulnerable to viruses and disease.
How do we keep the pH balanced to prevent illness and disease?
Maintaining an approximate 80% alkalinity and 20% acidity diet is the best way to maintain wellness.
Acidic foods (alcohol, refined sugars, coffee, fast foods, chocolate, red meat, fish, dairy) are foods that are associated with disease. A highly acidic diet creates a favourable environment for yeast, fungus, abnormal cells and even parasites to multiply and grow.

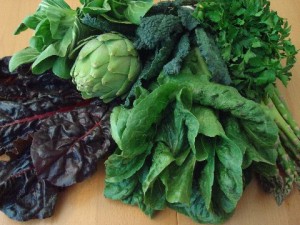
Alkaline foods (most fruit and vegetables such as leafy greens, lemons, citrus fruits, berries, broccoli, cabbage, nuts, herbal tea) are foods which maintain and prevent disease from occurring in the body.
What are intestinal parasites?
Even the word “parasite” sounds terrible. Like a villain, living off the goodness within you! Eeek!
Parasites infect the gastro-intestinal tract of humans and other animals. They can live throughout the body, but most prefer the intestinal wall. Means of exposure include: ingestion of undercooked meat, drinking infected water, and skin absorption.

What’s the plan to get them out of you ASAP!?
Antibiotics are advised for intestinal parasites from your GP. However there are other options and/or in combination:
Firstly, the 4 R’s:
1. Remove the micro-organisms that shouldn’t be there, as well as toxic foods (acidic) you shouldn’t be eating
2. Replace/restore the nutrients, bacteria, intestinal flora (pre and probiotics)
3. Repair the cell on every level
4. Relaxation! – Stress, anxiety etc
Remove – Many qualified health practitioners can sort a digestive cleanse for you, using anti-microbials which first rid the body of the unwanted organisms. This can be a long haul as the organism will continue to reproduce.
Including colonics – a colon enema cleanse which literally involves flushing the colon with water and herbs.
Removing foods that have inflammatory properties will aid the whole process – wheat, gluten, soy, dairy, sugar, alcohol, fructose.
Replace/restore – In addition to the above digestive cleanse, probiotics are taken at the same time to restore the yummy gut flora. Probiotics can be taken in tablet form, yoghurt, kombucha (a fermented herbal tea – see my how to make kombucha post) or fermented vegetables. I would recommend all of the above, except for dairy during the cleanse.
Maintaining a diet that is 80% alkaline will create an unhappy environment for the parasites as they enjoy the acidity.
Repair – Additional supplements and herbs can be prescribed for you which will improve your overall health, aside from probiotics etc. Such as immune support which is a common imbalance to get parasites, worms etc in the first place. Seeking treatment from a qualified practitioner such as Chinese medicine would be ideal.
Relax – A key rule in life, not just for intestinal upsets. Regular exercise, sleeping well, good emotional-mental health, breathing deeply etc.

Note:
Intestinal parasites can be missed in stool samples, so ask your doctor for 2 or 3 samples to do a week a part just in case.
Following up with stool tests 3 and 6 months after being diagnosed is ideal. They will most certainly want to survive in you!
You may think “oh gosh it will be such a long process to rid these parasites” … but your whole digestive system will have improved and I will guarantee you will learn more about your health, diet and lifestyle in the process !!
Take care of you, see you in the clinic,
TK xx
Learn more > http://www.tanyakeamwellness.com
by Tanya Keam | Feb 3, 2015 | Bread, Cultures, DIY Wellness Tips, Fermented, Food, Gut flora, Homemade, Nourishing, Recipes, Sourdough, Sunshine coast, Vegan, Vegetarian, Wellness
Gluten and wheat free diets are becoming increasingly popular by many people these days. However, unless food allergy or sensitivity testing from health partitioners such as Naturopaths, Kinesiologists or General practitioners have been done, I’m not sold on the idea that wheat is the devil completely. The way wheat is processed in Australia though, that’s a whole other story !
In the case of digestive discomfort, pain, bloating, fatigue etc, I suggest to see a healthcare practitioner who can balance your digestive health so that these types of foods are digested well to avoid such symptoms. Acupuncture, Naturopathy and Ayurveda can be of benefit here. Having said that, for some people, wheat is better avoided completely, or only enjoyed 1 -2 times a week. For others, wheat is just too dominant in their diet – it turns out that they are basing all three meals around it. Thus, if this can be reduced, it’s got to be a good thing to use spelt. So here we are.
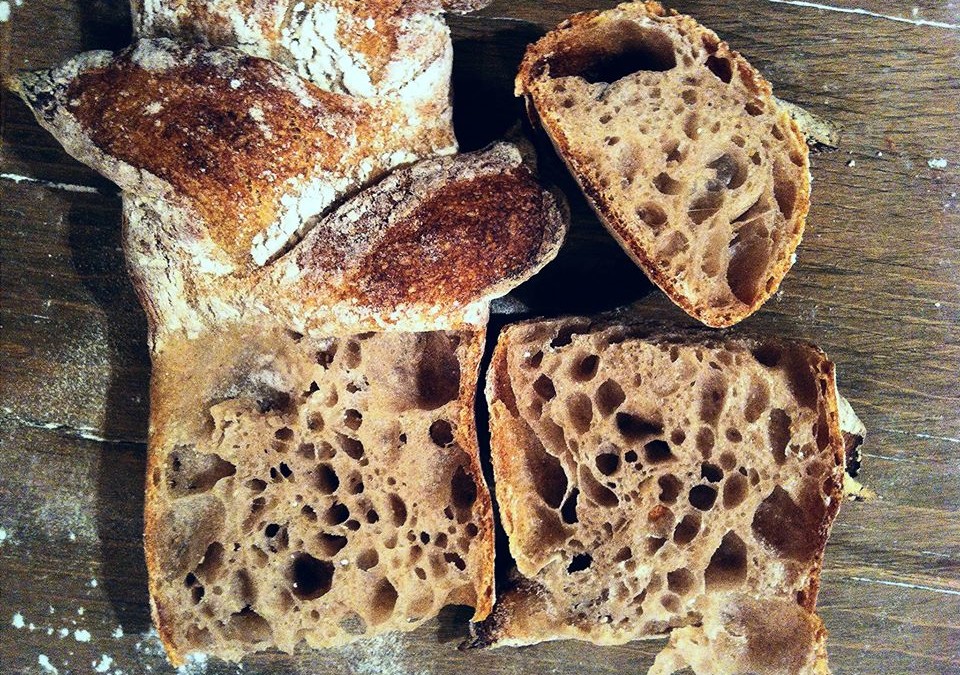
Spelt flour is a very viable grain to use as it ferments well. It has a lot of natural enzymes and wild yeasts in there, and it holds for a while without turning acid. This is good for the purpose of making bread. Spelt sour dough starters can also be added to other grain sour dough breads. There is gluten is sourdough, however the fermentation process changes glutens form so it is a better option than wheat if you don’t want to be completely gluten free.
So where to start…..
To get the dough to rise, we need to create a fermentation process. Fermentation involves the culture and growth of naturally occurring fungi (yeasts), as well as bacteria and other micro organisms. When fermentation occurs in the dough, carbon dioxide is given off as a natural bi product. Sourdough starter is the thing which begins and feeds the fermentation process in dough, as it is rich in bacteria, enzymes such as amalyse and naturally occurring yeasts. This combination provides a perfect medium for the process called leavening.
There are lots of ways to make bread rise, but they all rely on the same process of fermentation I just mentioned. For example, Baking soda and some sort of acid (cream of tartare, lemon juice or vinegar) will create the necessary chemical reaction to begin fermentation in dough.

The Healthy Cultures
Sourdough starter is also a culture of ‘friendly’ bacteria. This culture helps to create the ideal conditions for the yeasts to multiply, by dealing with some of the bi products of the cell division process. They keep everything clean and moving freely – kind of like cultural street sweepers.
A healthy Sourdough Starter has a relatively stable microbiology; it’s a living thing which, with the right conditions, can be trained to produce consistent and great tasting bread every time. Not only that, but most experts agree that sourdough bread is easier to digest and provides better nutrition than ordinary yeasted breads.
How to avoid Candida Albans
Unfortunately, commercial yeast is designed to be very bland in flavour. It won’t survive lactic acid either, which is present in all sourdough cultures. Cervisea can trigger infections within the body when left to reproduce in the stomach of a human being. The temperature inside us, combined with our intake of sugar and liquids, can prove to be ideal for the growth of candida albicans; a common form of yeast infection leading to many allergic reactions and gradual immune system depletion. When you couple the use of refined yeast with yeast foods such as Bread Improver, the potential for long term ill health is multiplied many times. Sourdough starter can be made quite easily to replace commercial yeast or baking powder to make the dough rise when you want to make home made bread.

Step 1
Sourdough starter has the simplest of recipes:
- one part flour to one part water!
You can try just about any kind of flour (or even cooked grain). The rule of thumb is consistency – it should be a very thick batter to start with, so it just pours.
If it’s runny, it’s too thin, and if it’s a dough, it’s too thick. You can vary the consistency later, when you know what you’re doing. But for now, work within these parameters for best results.
14 day fermentation.

In the early stages
The starter is very fragile – but over time they grow stronger, as local yeasts and bacteria take hold. The most important thing in the early days is not to ‘drown’ the starter with too much food. It’s better to leave it alone to do its thing than to fuss over it all the time.. so wait another day. Lash out if you like – wait two! What the heck! Wait a week. It’ll be better for it!

Some tips before you try the recipe
- In the early stages of fermenting a starter, you’ll get some wastage, as you need to pour off some of the batter as you go, in order to feed it with fresh food. This batter you pour off can be used in your regular yeasted dough or a pancake mix.
- To minimise wastage, start very, very small. We’re talking a tablespoon of flour to start with.
- The warmer the starter gets, the more activity there is, and so the more often you’ll need to feed it.
- The lower the temperature, the slower the fermentation process. If the temperature is too low, fermentation will be overtaken by mould and the starter will become suffocated. However, even at temperatures below 5 degrees celsius but above freezing, fermentation can still be occurring. The mould which grows on the surface will dry out, and can be peeled off and discarded to no ill effect. The remaining batter can be fed and re established quite quickly, and become active and useful again virtually overnight. In fact, the healthy starter underneath the mould is often ready for use straight away. If unsure, feed with just a bit of flour and wait a few hours.
- The flavour of starter is strongly influenced by the amount of times it passes through a certain temperature threshold – sourdough starter becomes more sour each time it returns to a chilled state after being fully thawed. It will also become more sweeter hen fed more frequently, but will take longer to leaven your dough.
-
Equally, the flavour is also influenced by how thick the starter is – if it’s made as a dough or thicker, it will ferment slowly but will make more full flavoured, classic sourdough bread.
A home for your starter
If you have a plastic container with a loose fitting lid, about 2 litres capacity, then you have the perfect vessel for starter to live in. If you only have, say, a small jar with a tight sealing lid, then puncture the lid with a knife so a little air can pass through.
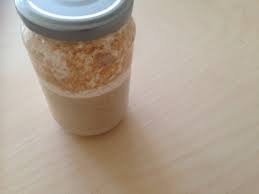
Ultimately, this will become your starter’s abode. It lives in your refrigerator between uses, and will be left out before use to thaw slightly, so as activity is happening. If you are in a warm climate in mid summer, you will need to only bring the starter out of the fridge for an hour or less when you are making bread. If you live in a cold climate, the starter may live out of the fridge all the time. This of course something which you will adapt according to your experience – but I have found that the fridge is the best default storage area, as they run at a consistent temperature and are reasonably immune from airborne contaminants.

Happy fermenting!
Take care of you, see you in the clinic,
TK xx
Learn more > http://www.tanyakeamwellness.com
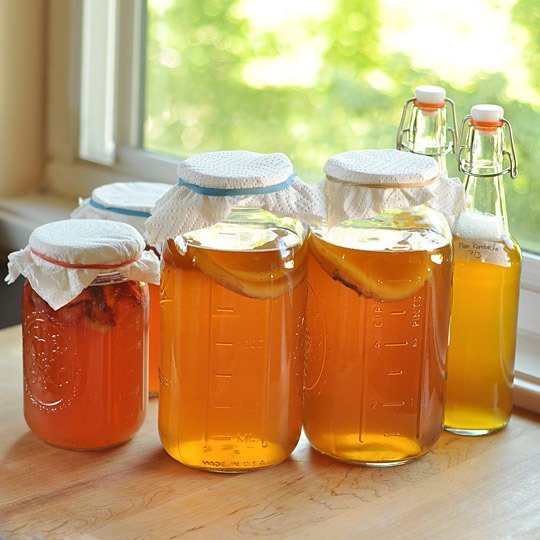
by Tanya Keam | Jan 19, 2015 | Client information, Cultures, DIY Wellness Tips, Fermented, Food, Gut flora, Kombucha, Nourishing, Nutrition, Probiotic drink, Recipes, Sunshine coast, Vegan, Vegetarian, Wellness
What Is Kombucha Tea?
The first recorded use of Kombucha was in 221 B.C. during the Chinese empire of the Tsin-Dynasty. They called it “The remedy for immortality” or the “divine tische”. It is a living health drink which has been used for thousands of years to help stimulate the metabolism and maintain a healthy immune system.
Kombucha starts out as a sugary tea, which is then fermented with the help of a scoby. “SCOBY” is actually an acronym for “symbiotic culture of bacteria and yeast.”
The scoby bacteria and yeast eat the majority of the sugar in the tea, transforming the tea into a refreshingly fizzy, slightly sour fermented (but mostly non-alcoholic) beverage that is relatively low in calories. Flavours can be added to the Kombucha such as ginger, pear or blackberries.
The SCOBY
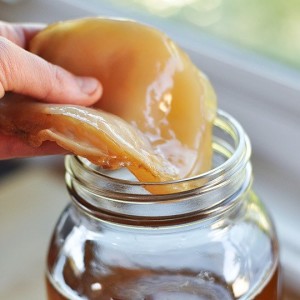
Let’s talk about that scoby. It’s weird, right?! It floats, it’s rubbery and slightly spongy, brown stringy bits hang from it, and it transforms sugary tea into something fizzy and sour. It’s totally weird. But if you take a step back, it’s also pretty awesome.
There are a lot of theories about why the bacteria and yeast form this jelly-like layer of cellulose at the top of the kombucha. The most plausible that I’ve found is that it protects the fermenting tea from the air and helps maintain a very specific environment inside the jar that is shielded from outsiders, aka unfriendly bacteria.
Probiotics?
Which brings us to the next question: what’s actually in kombucha? Kombucha is indisputably full of probiotics and other happy things that our intestines love and that help boost our overall health.
How to Make Kombucha Tea at Home
Makes about 4 litres
What You Need
Ingredients
4.5 cups of filtered water
1 cup white sugar or raw brown sugar – The less processing the better
8 bags black tea (or 2 tablespoons loose tea) – I prefer English Breakfast tea
2 cups starter tea from last batch of kombucha or store-bought (unpasteurized, neutral-flavoured) kombucha
1 scoby per fermentation jar
Optional flavouring extras for bottling: 1 to 2 cups chopped fruit, ginger, turmeric, lime, 2 to 3 cups fruit juice, 1 to 2 tablespoons flavoured tea (like hibiscus or Earl Grey), 1/4 cup honey, 2 to 4 tablespoons fresh herbs or spices
Equipment
Stock pot
A jar big enough to hold 4 cups of water with room spare
Bottles: Six 16-oz glass bottles with plastic lids, 6 swing-top bottles, or clean soda bottles
Small funnel
Instructions
Note: Avoid prolonged contact between the kombucha and metal both during and after brewing. This can affect the flavour of your kombucha and weaken the scoby over time.
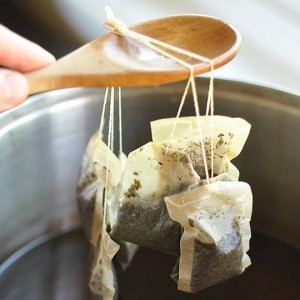
1. Make the Tea Base: Bring the water to a boil. Remove from heat and stir in the sugar to dissolve. Drop in the tea and allow it to steep until the water has cooled. Depending on the size of your pot, this will take a few hours. You can speed up the cooling process by placing the pot in an ice bath.
2. Add the Starter Tea: Once the tea is cool, remove the tea bags or strain out the loose tea. Stir in the starter tea. (The starter tea makes the liquid acidic, which prevents unfriendly bacteria from taking up residence in the first few days of fermentation.)
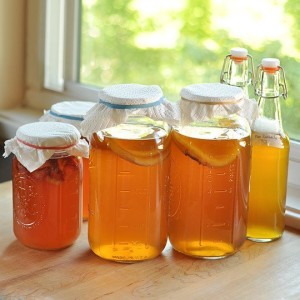
3. Transfer to Jars and Add the Scoby: Pour the mixture into your glass jar and gently slide the scoby or fermented little bits that will be floating in the bottom of a store bought kombucha, into the jar with clean hands. Cover the mouth of the jar with a few layers of cheesecloth or paper towels secured with a rubber band.
4. Ferment for 7 to 10 Days: Keep the jar at room temperature, out of direct sunlight, and where it won’t get touched or moved around. Ferment for 7 to 10 days, checking the kombucha and the scoby periodically.
It’s not unusual for the scoby to float at the top, bottom, or even sideways. A new cream-colored layer of scoby should start forming on the surface of the kombucha within a few days. It usually attaches to the old scoby, but it’s ok if they separate. You may also see brown stringy bits floating beneath the scoby, sediment collecting at the bottom, and bubbles collecting around the scoby. This is all normal and signs of healthy fermentation.
After seven days, begin tasting the kombucha daily by pouring a little out of the jar and into a cup. When it reaches a balance of sweetness and tartness that is pleasant to you, the kombucha is ready to bottle.
5. Remove the Scoby: Before proceeding, prepare and cool another pot of strong tea for your next batch of kombucha, as outlined above. With clean hands, gently lift the scoby out of the kombucha and set it on a clean plate. As you do, check it over and remove the bottom layer if the scoby is getting very thick.
6. Bottle the Finished Kombucha: Measure out your starter tea from this batch of kombucha and set it aside for the next batch. Pour the fermented kombucha (straining, if desired) into bottles using the small funnel, along with any juice, herbs, or fruit you may want to use as flavouring. Leave about a half inch of head room in each bottle. (Alternatively, infuse the kombucha with flavourings for a day or two in another jar covered with cheesecloth, strain, and then bottle. This makes a cleaner kombucha without “stuff” in it.)
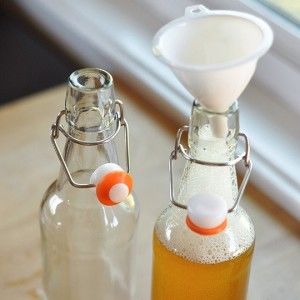
7. Carbonate and Refrigerate the Finished Kombucha: Store the bottled kombucha at room-temperature out of direct sunlight and allow 1 to 3 days for the kombucha to carbonate (the added fruit you added allows for a second fermentation process which is where it becomes carbonated). Until you get a feel for how quickly your kombucha carbonates, it’s helpful to keep it in plastic bottles; the kombucha is carbonated when the bottles feel rock solid. Refrigerate to stop fermentation and carbonation, and then consume your kombucha within a month. It is a good idea to open the bottle to let some gas/air bubbles out otherwise it will explode like a Champaign bottle!
8. Make a Fresh Batch of Kombucha: Clean the jar being used for kombucha fermentation. Combine the starter tea from your last batch of kombucha with the fresh batch of sugary tea, and pour it into the fermentation jar. Slide the scoby on top, cover, and ferment for 7 to 10 days.
Additional Notes:
• Batch Size: To increase or decrease the amount of kombucha you make, maintain the basic ratio of 1 cup of sugar, 8 bags of tea, and 2 cups starter tea per 4 cups water batch. One scoby will ferment any size batch, though larger batches may take longer.
• Putting Kombucha on Pause: If you’ll be away for 3 weeks or less, just make a fresh batch and leave it on your counter. It will likely be too vinegary to drink by the time you get back, but the scoby will be fine. For longer breaks, store the scoby in a fresh batch of the tea base with starter tea in the fridge. Change out the tea for a fresh batch every 4 to 6 weeks.
• Other Tea Options: Black tea tends to be the easiest and most reliable for the scoby to ferment into kombucha, but once your scoby is going strong, you can try branching out into other kinds. Green tea, white tea, oolong tea, or a even mix of these make especially good kombucha. Herbal teas are ok, but be sure to use at least a few bags of black tea in the mix to make sure the scoby is getting all the nutrients it needs. Avoid any teas that contain oils, like earl grey or flavored teas.
• Avoid Prolonged Contact with Metal: Using metal utensils is generally fine, but avoid fermenting or bottling the kombucha in anything that brings them into contact with metal. Metals, especially reactive metals like aluminum, can give the kombucha a metallic flavor and weaken the scoby over time.
Troubleshooting Kombucha
• It is normal for the scoby to float on the top, bottom, or sideways in the jar. It is also normal for brown strings to form below the scoby or to collect on the bottom. If your scoby develops a hole, bumps, dried patches, darker brown patches, or clear jelly-like patches, it is still fine to use. Usually these are all indicative of changes in the environment of your kitchen and not a problem with the scoby itself.
• Kombucha will start off with a neutral aroma and then smell progressively more vinegary as brewing progresses. If it starts to smell cheesy, rotten, or otherwise unpleasant, this is a sign that something has gone wrong. If you see no signs of mold on the scoby, discard the liquid and begin again with fresh tea. If you do see signs of mold, discard both the scoby and the liquid and begin again with new ingredients.
• A scoby will last a very long time, but it’s not indestructible. If the scoby becomes black, that is a sign that it has passed its lifespan. If it develops green or black mold, it is has become infected. In both of these cases, throw away the scoby and begin again.
• To prolong the life and maintain the health of your scoby, stick to the ratio of sugar, tea, starter tea, and water outlined in the recipe. You should also peel off the bottom (oldest) layer every few batches. This can be discarded, composted, used to start a new batch of kombucha, or given to a friend to start their own.
• If you’re ever in doubt about whether there is a problem with your scoby, just continue brewing batches but discard the kombucha they make. If there’s a problem, it will get worse over time and become very apparent. If it’s just a natural aspect of the scoby, then it will stay consistent from batch to batch and the kombucha is fine for drinking.
Brewing Kombucha Safely
And while the homebrewed nature of kombucha makes some home cooks nervous, is unlikely that kombucha will ever make you sick. Like all things, you need to use common sense when brewing it and pay attention to what you’re doing. It’s natural to feel nervous and unsure at first. Bottom line: if the scoby is healthy, then the kombucha will be healthy.
Is There Alcohol in Kombucha?
Kombucha does contain a little bit of alcohol as a by-product of the fermentation process. It is usually no more than 1%. Unless you drink a lot of it back to back, you won’t get drunk. But people with alcohol sensitivities should be aware of its presence.
I’m breaking the kombucha-making process into very small steps here. It looks long and complicated, but this is actually a very straightforward and streamlined process. Once you get into the rhythm of it, bottling a finished batch of kombucha and preparing the next only takes about 20 minutes every 7 to 10 days.
Where to Find Kombucha Brewing Supplies
You can use regular, store-bought tea and sugar for brewing kombucha. You can pick up a scoby from a kombucha-brewing friend or even make your own. They are available online also, however give starting your own from scratch a go!
Have fun ! Take care of you, see you in the clinic,
TK xx
Learn more > http://www.tanyakeamwellness.com


