by Tanya Keam | Jun 11, 2018 | Acupuncture, Chinese medicine, Client information, Cough, Dairy alternatives, Dairy free, DIY Wellness Tips, Food, Herbal remedies, Homemade, Immune Support, Immune system, Nambour, Nutrition, Recipes, Seasonal living, Smoothie, Sunshine coast, Vegan, Vegetarian, Wellness, Winter
A simple Chinese Medicine cough recipe
Chinese medicine is seasonal medicine – what better way to take care of yourself than a cough recipe to look after you this season. In Winter it is recommended to consume less cold and raw food as it harsh on our digestive system to process, which is a balmy 36.5 degrees inside. Putting something the temperature of the fridge in a nice warm coldren stomach, first takes energy to warm it before it can digest it. This can lead to fatigue, bloating, and loose bowel movements.
In late Autumn and Winter we opt for:
- More warming foods such as soups and stews to warm us up from the inside!
- Smoothies are generally not recommended in Winter at all as they are too cold. However putting a wonderful twist on the conventional fruit smoothie so that is warming not only for our digestive system but designed to benefit the lungs and relieve coughs.
The main ingredient, pears, is highly valued in Chinese medicine as the fruit that is most beneficial for coughs. What does Autumn and Winter bring? You guessed it, coughs!
Pears are “sweet, slightly sour, and cool.” They “generate fluids” but also “dissolve phlegm,” so they are ideal for treating dry coughs, a hoarse voice, thirst and agitation in general.
Our second key ingredient is almonds which is also a great dairy alternative in smoothies. Almonds have similar properties to apricots in Chinese medicine, with apricot seeds being used as one of the key medicinals for treating coughs. Almonds are not as potent as apricot seeds (which have some mild toxicity and shouldn’t be consumed on a regular basis), but they do have some similar properties – moistening the lungs, relieving coughing and wheezing. That makes them the perfect complement to pears in this smoothie.
This recipe is specific for almond milk which helps resolve phlegm, so don’t switch it up for dairy milk as dairy is more phlegm forming.
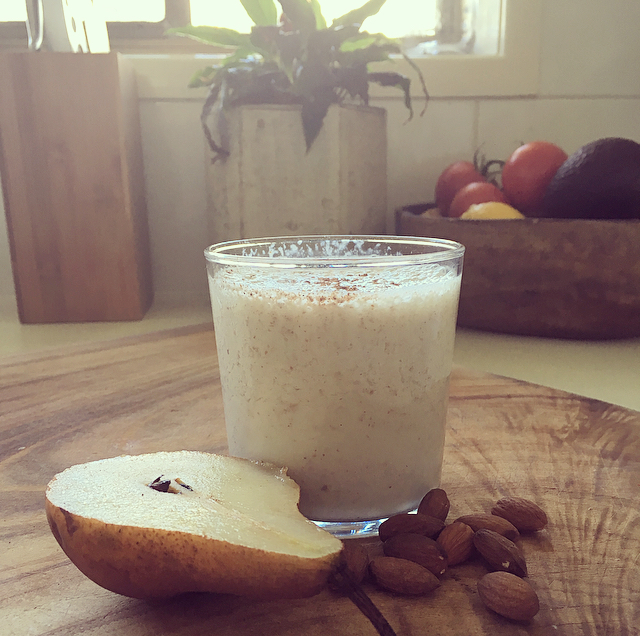
Chinese Medicine Cough Recipe (Spiced Pear Smoothie with Almonds and Chia)
Serving size: About 1-2
Ideal for high speed blender
Ingredients
1 Pear (room temperature)
¾-1cup Almond Milk (how thick do you like it?)
10 natural Almonds (soaked overnight in water if possible, otherwise raw is fine)
¼-1/2 teaspoon Garam Masala spice
Dash Cayenne pepper or Cinnamon (to keep the digestive system warm)
1 tablespoon Chia Seed (can be soaked in almond milk prior for 15 minutes to turn into a jelly)
1-2 teaspoons Manuka honey
NO ICE !
Directions
Blend all ingredients until smooth. Enjoy!
Take care this Winter, there has already been many colds and influenza floating around.
 Hi, I’m Tanya, an Acupuncturist and Chinese medicine practitioner in Nambour on the Sunshine Coast, Queensland Australia. I practice Chinese medicine because its safe, logical, relevant and has effectively shown methods of natural wellness for thousands of years (read more about my training here). Life doesn’t need to be complicated and nor does the treatment approaches to get people feeling vibrant and well. I’ve seen people gain a lot from treatments, much more than just alleviating symptoms. It’s exciting to connect with people and share deep wisdom from the classics of ancient and traditional medicine, with modern protocols for todays mind-body living. See you in the clinic !
Contact me
Book online
by Tanya Keam | Nov 30, 2016 | Acupuncture, Chinese medicine, fertility acupuncture, Homemade, Nambour, Nourishing, Nutrition, Recipes, Seasonal living, Sunshine coast, Vegetarian, Wellness
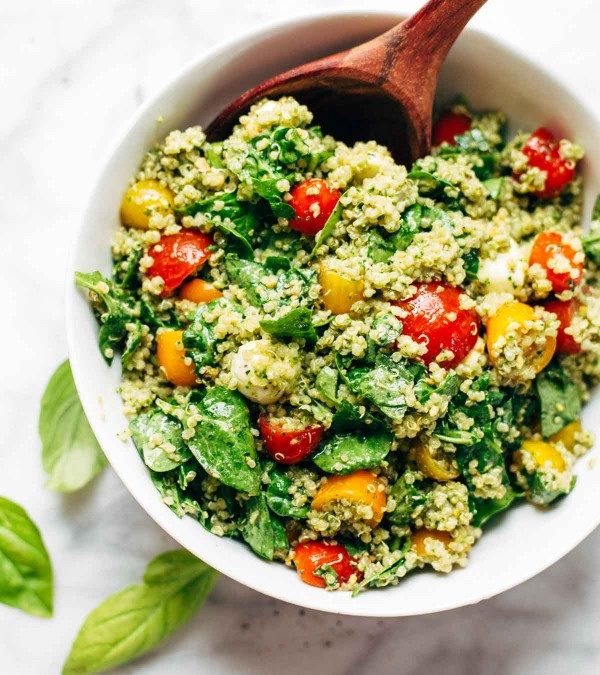
- 2 cups cooked quinoa (cooked with your choice of broth)
- 2 cups halved cherry tomatoes
- 2 cups spinach leaves
- ½ cup (or more, to taste) avocado coriander dressing
- Haloumi cheese (grilled) or Mozarrella, cut into bite sized pieces
- a few handfuls of crushed almonds or other nuts
- grilled veggies like asparagus or zucchini
- grilled chicken or another protein such as tofu
- half an avocado
- ¼ cup Greek yogurt
- ½ cup water (more as needed to adjust consistency)
- 1 cup coriander leaves and stems
- 1 small clove of garlic
- ½ teaspoon salt
- a squeeze of lime juice
Put together all ingredients in a bowl, chill dressing separately until ready to serve.
An easy and healthy meal to prepare for Summer gatherings.
Eat well, take care of you, see you in the clinic,
TK xx
Tanya Keam Wellness is an experienced health clinic in Nambour on the Sunshine Coast. Helping you to feel better in all aspects of your health and wellbeing.
by Tanya Keam | Aug 4, 2016 | Chinese medicine, Client information, Dairy alternatives, Dairy free, DIY Wellness Tips, Food, Homemade, Nourishing, Nutrition, Recipes, Vegan, Vegetarian
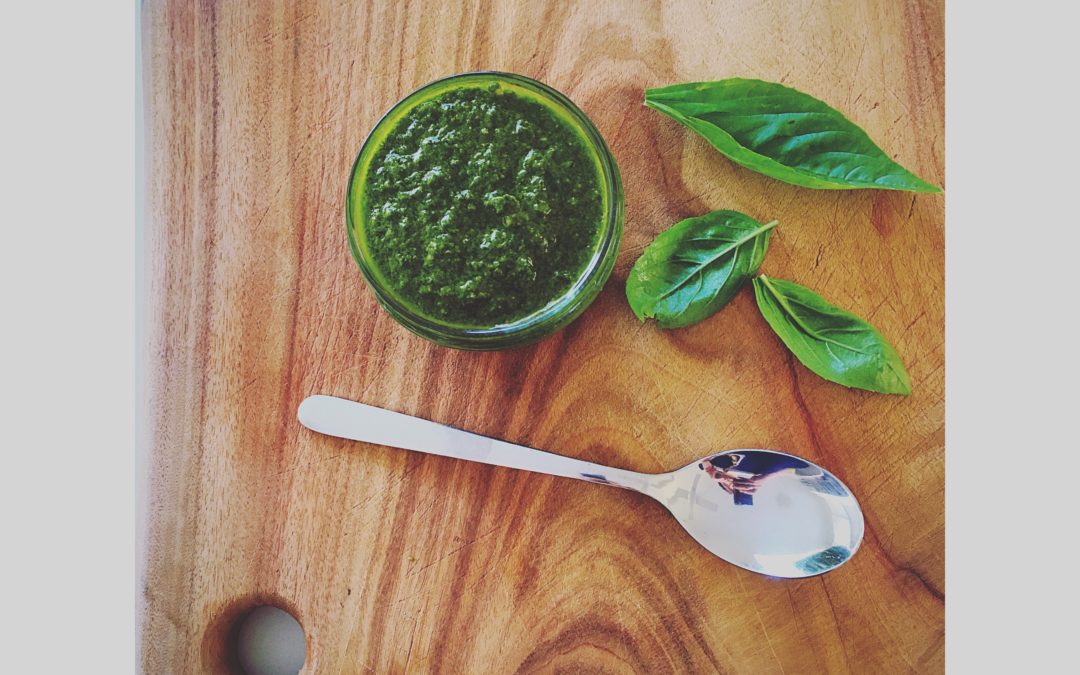
2 cups (tightly packed) fresh basil, rinsed thoroughly and dried
1/3 cup raw pine nuts or walnuts
1/2 cup extra virgin olive oil
3 garlic gloves, chopped
Pinch of black pepper and sea salt / himalayan salt
2 tablespoons of nutritional yeast (BRAGG) – Made from inactive yeast that has a cheesy flavour, used to replace parmesan cheese in traditional pesto. You can find it in most health food stores.
Blend all ingredients together in a food processor, first start with half the oil, blend, stir with a spoon, add remaining oil and blend on high again.
Store in the fridge for up to 3 weeks in an air tight glass jar. Add a little oil on the top of jar to keep the pesto moist.
Basil is high in Vitamin K, vitamin C, vitamin A, iron, magnesium, folate and manganese.
Enjoy with your favourite roast vegetables, buckwheat pasta or raw zucchini curly noodles!
Eat well, take care of you, see you in the clinic,
TK xx
Tanya Keam Wellness is an experienced health clinic on the Sunshine Coast. Helping you to feel better in all aspects of your health and wellbeing.
by Tanya Keam | Feb 4, 2015 | Autumn, Chinese medicine, Client information, DIY Wellness Tips, Food, Herbal remedies, Homemade, Immune Support, Immune system, Liver Health, Nourishing, Nutrition, Recipes, Seasonal living, Sunshine coast, Wellness, Winter
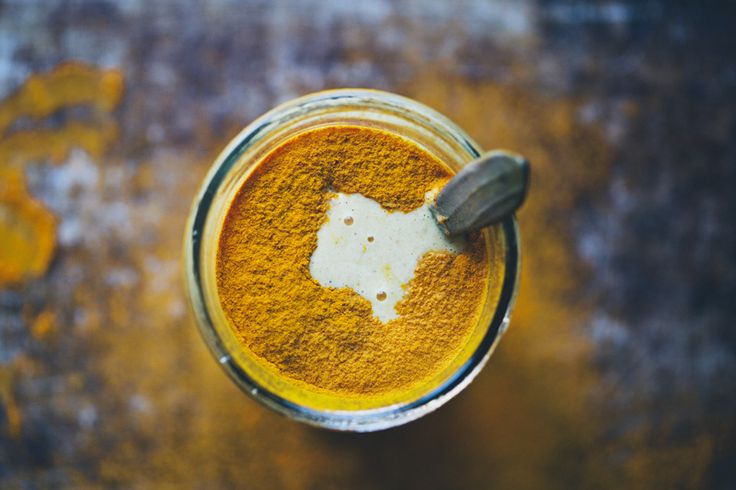
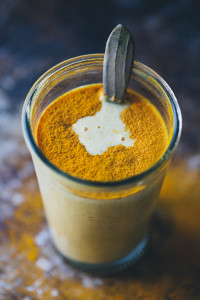
Immune Boosting Tumeric Lassi
The Benefits of Tumeric
1. Otherwise known as Circuma longa, is a member of the ginger family, Zingaberaceae.
2. A wonderful aspect on the liver. Spring (and late winter) is an important time to consume herbs and foods that strengthen the liver, because spring is the season which rules the liver and gallbladder in Traditional Chinese Medicine. It is said to shrink engorged hepatic ducts, so it can be useful to treat liver conditions such as hepatitis, cirrhosis, and jaundice.
2. Highly valuable for the influence it exerts on the digestive system and the liver. In both Ayurvedic and Traditional Chinese Medicine, it is considered a digestive bitter and a carminative. It can be incorporated into foods, including rice and bean dishes, to improve digestion and reduce gas and bloating. It is a cholagogue, stimulating bile production in the liver and encouraging excretion of bile via the gallbladder. This improves the body’s ability to digest fats.
3. Recommended for chronic digestive weakness and/or congestion. It can be taken as a single extract or in the form of digestive bitters, which combine turmeric with other bitter and carminative herbs. Take either of these twenty minutes before meals, especially meals that are high in protein and/or fat. It is beneficial for people who feel tired after consuming meals or who experience gas and bloating.
4. Anti-inflammatory to the mucous membranes, which coat the throat, lungs, stomach and intestines. Turmeric decreases congestion and inflammation from stagnant mucous membranes. People with the following conditions could benefit from regular use of turmeric: IBS (Irritable Bowel Syndrome), colitis, Crohn’s disease, diarrhea, and post-giardia or post salmonella conditions. It can also reduce the itching and inflammation that accompanies hemorrhoids and anal fissures.
5. Useful to follow up antibiotic treatments, in addition to acidophilus and garlic. It helps to improve the intestinal flora and acts as an anti-bacterial.
6. Turmeric can also benefit skin conditions including: eczema, psoriasis and acne, for it is a potent detoxifier.
7. Turmeric is an antispasmodic to smooth muscles so it reduces digestive and menstrual cramping.
Try adding turmeric to your oatmeal, grains and beans, or take digestive bitters. Whatever way that turmeric is consumed it will benefit both the digestive system and the liver.
2 large or 4 small glasses
2 cups organic yogurt with active live culture, or dairy or nut milk
2 bananas
2 tsp freshly grated ginger
2 tsp honey, preferably raw (unpasteurized)
1/2 lemon, juice
2 tsp rosehip powder (optional but delicious, and a good C-vitamin boost)
1 tsp vanilla extract or ground vanilla
3-4 tsp ground turmeric (or fresh turmeric root)
Place all ingredients in a blender and mix on high speed until smooth. Add more yogurt if you prefer. Pour the lassi in two large glasses. For a more stunning presentation, dust 1 tsp ground turmeric on top before serving. Add a straw and serve.
Eat well, drink well, take care of you, see you in the clinic,
TK xx
Learn more > http://www.tanyakeamwellness.com
by Tanya Keam | Feb 4, 2015 | Chinese medicine, Client information, Daily Rituals, Dairy free, DIY Wellness Tips, Food, Gut flora, Herbal remedies, Homemade, Liver Health, Nourishing, Nutrition, Recipes, Seasonal living, Sunshine coast, Vegan, Vegetarian, Wellness
The Five Flavours in TCM
Foods are associated with certain specific properties according to their taste. The five flavours TCM recognizes are: sour, sweet, bitter, pungent and salty. These are also linked to the four natures, being temperatures: cold, cool, warm and hot. TCM uses the flavours of food to coincide with the seasons. For example: In winter we enjoy more warm – hot meals to warm us up, and in Summer we enjoy more cool – cold foods to cool us down.
It is thought that lemons originated in China (along with India, Burma and other parts of southeast Asia) so it’s no surprize that the lemon also forms a part of a healthy diet according to Traditional Chinese Medicine (or TCM).
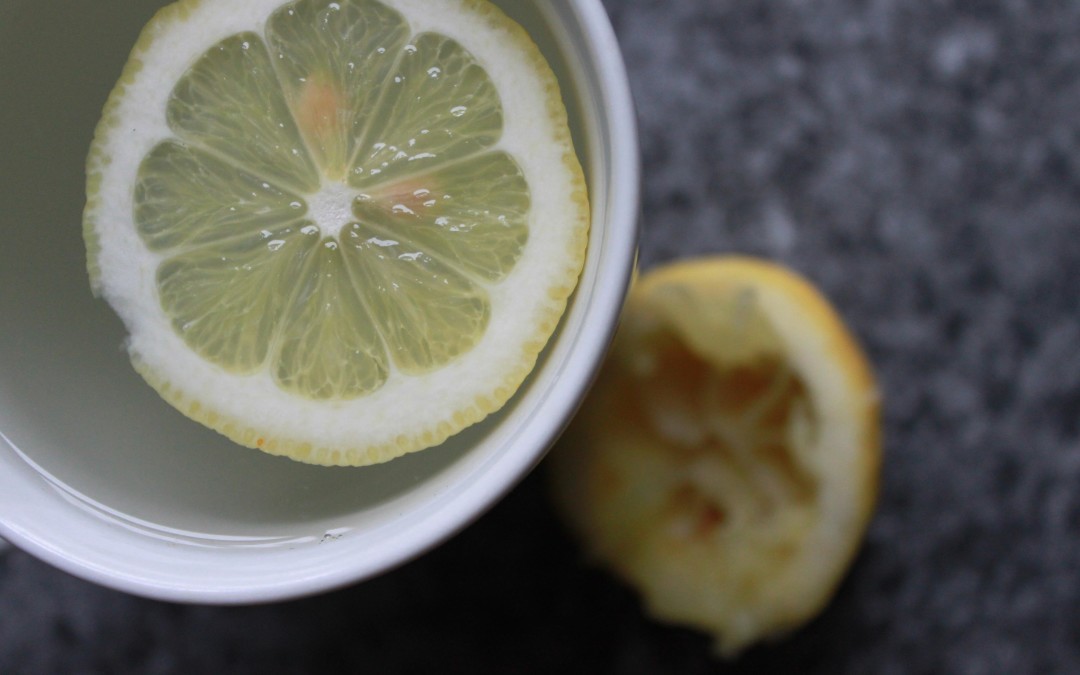
Hot lemon water first thing in the morning is ideal for the liver to get things moving for the day ahead, both energetically, as well as to hydrate the body after 8 hours of sleep, and to stimulate bile to assist the digestive system in breaking down food.
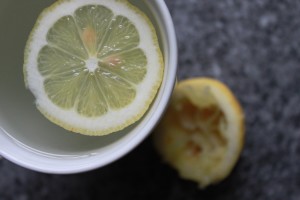
- Lemons are very beneficial for colon health due to the pectin fibres and also serves as a powerful antibacterial
- Lemon is an excellent and rich source of vitamin C, an essential nutrient that protects the body against immune system deficiencies
- It balances maintain the pH levels in the body
- Having warm lemon juice early in the morning helps flush out toxins
- It aids digestion juices and encourages the production of bile
- It is also a great source citric acid, potassium, calcium, phosphorus and magnesium
- It helps prevent the growth and multiplication of pathogenic bacteria that cause infections and diseases
- It helps reducing pain and inflammation in joints and knees as it dissolves uric acid
- It helps shift common cold symptoms
- The potassium content in lemon helps nourish brain and nerve cells
- It strengthens the liver by providing energy to the liver enzymes when they are too dilute
- It helps balance the calcium and oxygen levels in the liver In case of a heart burn, taking a glass of concentrated lemon juice can give relief
- It is of immense benefit to the skin and it prevents the formation of wrinkles and acne
- It helps maintain the health of the eyes and helps fight against eye problems
- Lemon juice helps replenish body salts especially after a strenuous workout session

Tips
Juice a whole heap of lemons in one go and freeze the juice into ice cubes so that they are ready to go each morning
Diluting the juice and brushing your teeth after drinking is advised to prevent tooth enamel decay.
Take care of you, see you in the clinic,
TK xx
Learn more > http://www.tanyakeamwellness.com
by Tanya Keam | Feb 3, 2015 | Bread, Cultures, DIY Wellness Tips, Fermented, Food, Gut flora, Homemade, Nourishing, Recipes, Sourdough, Sunshine coast, Vegan, Vegetarian, Wellness
Gluten and wheat free diets are becoming increasingly popular by many people these days. However, unless food allergy or sensitivity testing from health partitioners such as Naturopaths, Kinesiologists or General practitioners have been done, I’m not sold on the idea that wheat is the devil completely. The way wheat is processed in Australia though, that’s a whole other story !
In the case of digestive discomfort, pain, bloating, fatigue etc, I suggest to see a healthcare practitioner who can balance your digestive health so that these types of foods are digested well to avoid such symptoms. Acupuncture, Naturopathy and Ayurveda can be of benefit here. Having said that, for some people, wheat is better avoided completely, or only enjoyed 1 -2 times a week. For others, wheat is just too dominant in their diet – it turns out that they are basing all three meals around it. Thus, if this can be reduced, it’s got to be a good thing to use spelt. So here we are.
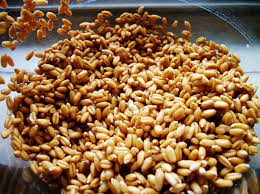
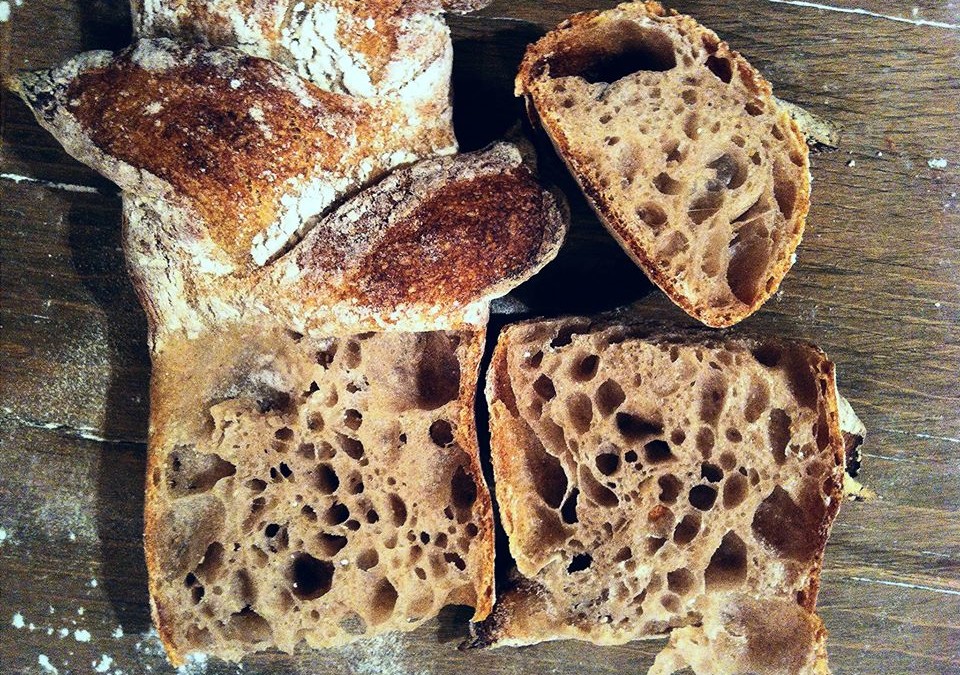
Spelt flour is a very viable grain to use as it ferments well. It has a lot of natural enzymes and wild yeasts in there, and it holds for a while without turning acid. This is good for the purpose of making bread. Spelt sour dough starters can also be added to other grain sour dough breads. There is gluten is sourdough, however the fermentation process changes glutens form so it is a better option than wheat if you don’t want to be completely gluten free.
So where to start…..
To get the dough to rise, we need to create a fermentation process. Fermentation involves the culture and growth of naturally occurring fungi (yeasts), as well as bacteria and other micro organisms. When fermentation occurs in the dough, carbon dioxide is given off as a natural bi product. Sourdough starter is the thing which begins and feeds the fermentation process in dough, as it is rich in bacteria, enzymes such as amalyse and naturally occurring yeasts. This combination provides a perfect medium for the process called leavening.
There are lots of ways to make bread rise, but they all rely on the same process of fermentation I just mentioned. For example, Baking soda and some sort of acid (cream of tartare, lemon juice or vinegar) will create the necessary chemical reaction to begin fermentation in dough.

The Healthy Cultures
Sourdough starter is also a culture of ‘friendly’ bacteria. This culture helps to create the ideal conditions for the yeasts to multiply, by dealing with some of the bi products of the cell division process. They keep everything clean and moving freely – kind of like cultural street sweepers.
A healthy Sourdough Starter has a relatively stable microbiology; it’s a living thing which, with the right conditions, can be trained to produce consistent and great tasting bread every time. Not only that, but most experts agree that sourdough bread is easier to digest and provides better nutrition than ordinary yeasted breads.
How to avoid Candida Albans
Unfortunately, commercial yeast is designed to be very bland in flavour. It won’t survive lactic acid either, which is present in all sourdough cultures. Cervisea can trigger infections within the body when left to reproduce in the stomach of a human being. The temperature inside us, combined with our intake of sugar and liquids, can prove to be ideal for the growth of candida albicans; a common form of yeast infection leading to many allergic reactions and gradual immune system depletion. When you couple the use of refined yeast with yeast foods such as Bread Improver, the potential for long term ill health is multiplied many times. Sourdough starter can be made quite easily to replace commercial yeast or baking powder to make the dough rise when you want to make home made bread.

Step 1
Sourdough starter has the simplest of recipes:
- one part flour to one part water!
You can try just about any kind of flour (or even cooked grain). The rule of thumb is consistency – it should be a very thick batter to start with, so it just pours.
If it’s runny, it’s too thin, and if it’s a dough, it’s too thick. You can vary the consistency later, when you know what you’re doing. But for now, work within these parameters for best results.
14 day fermentation.

In the early stages
The starter is very fragile – but over time they grow stronger, as local yeasts and bacteria take hold. The most important thing in the early days is not to ‘drown’ the starter with too much food. It’s better to leave it alone to do its thing than to fuss over it all the time.. so wait another day. Lash out if you like – wait two! What the heck! Wait a week. It’ll be better for it!

Some tips before you try the recipe
- In the early stages of fermenting a starter, you’ll get some wastage, as you need to pour off some of the batter as you go, in order to feed it with fresh food. This batter you pour off can be used in your regular yeasted dough or a pancake mix.
- To minimise wastage, start very, very small. We’re talking a tablespoon of flour to start with.
- The warmer the starter gets, the more activity there is, and so the more often you’ll need to feed it.
- The lower the temperature, the slower the fermentation process. If the temperature is too low, fermentation will be overtaken by mould and the starter will become suffocated. However, even at temperatures below 5 degrees celsius but above freezing, fermentation can still be occurring. The mould which grows on the surface will dry out, and can be peeled off and discarded to no ill effect. The remaining batter can be fed and re established quite quickly, and become active and useful again virtually overnight. In fact, the healthy starter underneath the mould is often ready for use straight away. If unsure, feed with just a bit of flour and wait a few hours.
- The flavour of starter is strongly influenced by the amount of times it passes through a certain temperature threshold – sourdough starter becomes more sour each time it returns to a chilled state after being fully thawed. It will also become more sweeter hen fed more frequently, but will take longer to leaven your dough.
-
Equally, the flavour is also influenced by how thick the starter is – if it’s made as a dough or thicker, it will ferment slowly but will make more full flavoured, classic sourdough bread.
A home for your starter
If you have a plastic container with a loose fitting lid, about 2 litres capacity, then you have the perfect vessel for starter to live in. If you only have, say, a small jar with a tight sealing lid, then puncture the lid with a knife so a little air can pass through.
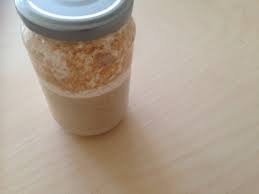
Ultimately, this will become your starter’s abode. It lives in your refrigerator between uses, and will be left out before use to thaw slightly, so as activity is happening. If you are in a warm climate in mid summer, you will need to only bring the starter out of the fridge for an hour or less when you are making bread. If you live in a cold climate, the starter may live out of the fridge all the time. This of course something which you will adapt according to your experience – but I have found that the fridge is the best default storage area, as they run at a consistent temperature and are reasonably immune from airborne contaminants.

Happy fermenting!
Take care of you, see you in the clinic,
TK xx
Learn more > http://www.tanyakeamwellness.com
by Tanya Keam | Jan 19, 2015 | Client information, Cultures, DIY Wellness Tips, Fermented, Food, Gut flora, Kombucha, Nourishing, Nutrition, Probiotic drink, Recipes, Sunshine coast, Vegan, Vegetarian, Wellness
What Is Kombucha Tea?
The first recorded use of Kombucha was in 221 B.C. during the Chinese empire of the Tsin-Dynasty. They called it “The remedy for immortality” or the “divine tische”. It is a living health drink which has been used for thousands of years to help stimulate the metabolism and maintain a healthy immune system.
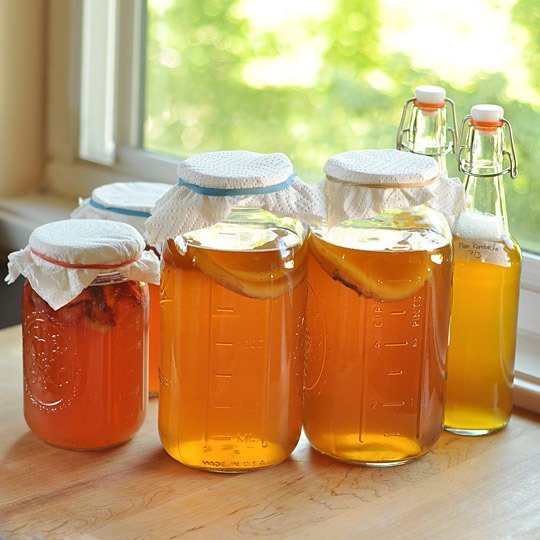
Kombucha starts out as a sugary tea, which is then fermented with the help of a scoby. “SCOBY” is actually an acronym for “symbiotic culture of bacteria and yeast.”
The scoby bacteria and yeast eat the majority of the sugar in the tea, transforming the tea into a refreshingly fizzy, slightly sour fermented (but mostly non-alcoholic) beverage that is relatively low in calories. Flavours can be added to the Kombucha such as ginger, pear or blackberries.
The SCOBY
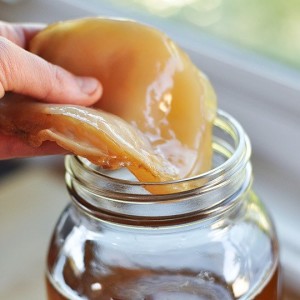
Let’s talk about that scoby. It’s weird, right?! It floats, it’s rubbery and slightly spongy, brown stringy bits hang from it, and it transforms sugary tea into something fizzy and sour. It’s totally weird. But if you take a step back, it’s also pretty awesome.
There are a lot of theories about why the bacteria and yeast form this jelly-like layer of cellulose at the top of the kombucha. The most plausible that I’ve found is that it protects the fermenting tea from the air and helps maintain a very specific environment inside the jar that is shielded from outsiders, aka unfriendly bacteria.
Probiotics?
Which brings us to the next question: what’s actually in kombucha? Kombucha is indisputably full of probiotics and other happy things that our intestines love and that help boost our overall health.
How to Make Kombucha Tea at Home
Makes about 4 litres
What You Need
Ingredients
4.5 cups of filtered water
1 cup white sugar or raw brown sugar – The less processing the better
8 bags black tea (or 2 tablespoons loose tea) – I prefer English Breakfast tea
2 cups starter tea from last batch of kombucha or store-bought (unpasteurized, neutral-flavoured) kombucha
1 scoby per fermentation jar
Optional flavouring extras for bottling: 1 to 2 cups chopped fruit, ginger, turmeric, lime, 2 to 3 cups fruit juice, 1 to 2 tablespoons flavoured tea (like hibiscus or Earl Grey), 1/4 cup honey, 2 to 4 tablespoons fresh herbs or spices
Equipment
Stock pot
A jar big enough to hold 4 cups of water with room spare
Bottles: Six 16-oz glass bottles with plastic lids, 6 swing-top bottles, or clean soda bottles
Small funnel
Instructions
Note: Avoid prolonged contact between the kombucha and metal both during and after brewing. This can affect the flavour of your kombucha and weaken the scoby over time.
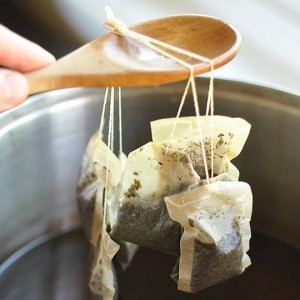
1. Make the Tea Base: Bring the water to a boil. Remove from heat and stir in the sugar to dissolve. Drop in the tea and allow it to steep until the water has cooled. Depending on the size of your pot, this will take a few hours. You can speed up the cooling process by placing the pot in an ice bath.
2. Add the Starter Tea: Once the tea is cool, remove the tea bags or strain out the loose tea. Stir in the starter tea. (The starter tea makes the liquid acidic, which prevents unfriendly bacteria from taking up residence in the first few days of fermentation.)
3. Transfer to Jars and Add the Scoby: Pour the mixture into your glass jar and gently slide the scoby or fermented little bits that will be floating in the bottom of a store bought kombucha, into the jar with clean hands. Cover the mouth of the jar with a few layers of cheesecloth or paper towels secured with a rubber band.
4. Ferment for 7 to 10 Days: Keep the jar at room temperature, out of direct sunlight, and where it won’t get touched or moved around. Ferment for 7 to 10 days, checking the kombucha and the scoby periodically.
It’s not unusual for the scoby to float at the top, bottom, or even sideways. A new cream-colored layer of scoby should start forming on the surface of the kombucha within a few days. It usually attaches to the old scoby, but it’s ok if they separate. You may also see brown stringy bits floating beneath the scoby, sediment collecting at the bottom, and bubbles collecting around the scoby. This is all normal and signs of healthy fermentation.
After seven days, begin tasting the kombucha daily by pouring a little out of the jar and into a cup. When it reaches a balance of sweetness and tartness that is pleasant to you, the kombucha is ready to bottle.
5. Remove the Scoby: Before proceeding, prepare and cool another pot of strong tea for your next batch of kombucha, as outlined above. With clean hands, gently lift the scoby out of the kombucha and set it on a clean plate. As you do, check it over and remove the bottom layer if the scoby is getting very thick.
6. Bottle the Finished Kombucha: Measure out your starter tea from this batch of kombucha and set it aside for the next batch. Pour the fermented kombucha (straining, if desired) into bottles using the small funnel, along with any juice, herbs, or fruit you may want to use as flavouring. Leave about a half inch of head room in each bottle. (Alternatively, infuse the kombucha with flavourings for a day or two in another jar covered with cheesecloth, strain, and then bottle. This makes a cleaner kombucha without “stuff” in it.)
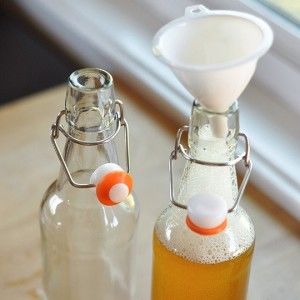
7. Carbonate and Refrigerate the Finished Kombucha: Store the bottled kombucha at room-temperature out of direct sunlight and allow 1 to 3 days for the kombucha to carbonate (the added fruit you added allows for a second fermentation process which is where it becomes carbonated). Until you get a feel for how quickly your kombucha carbonates, it’s helpful to keep it in plastic bottles; the kombucha is carbonated when the bottles feel rock solid. Refrigerate to stop fermentation and carbonation, and then consume your kombucha within a month. It is a good idea to open the bottle to let some gas/air bubbles out otherwise it will explode like a Champaign bottle!
8. Make a Fresh Batch of Kombucha: Clean the jar being used for kombucha fermentation. Combine the starter tea from your last batch of kombucha with the fresh batch of sugary tea, and pour it into the fermentation jar. Slide the scoby on top, cover, and ferment for 7 to 10 days.
Additional Notes:
• Batch Size: To increase or decrease the amount of kombucha you make, maintain the basic ratio of 1 cup of sugar, 8 bags of tea, and 2 cups starter tea per 4 cups water batch. One scoby will ferment any size batch, though larger batches may take longer.
• Putting Kombucha on Pause: If you’ll be away for 3 weeks or less, just make a fresh batch and leave it on your counter. It will likely be too vinegary to drink by the time you get back, but the scoby will be fine. For longer breaks, store the scoby in a fresh batch of the tea base with starter tea in the fridge. Change out the tea for a fresh batch every 4 to 6 weeks.
• Other Tea Options: Black tea tends to be the easiest and most reliable for the scoby to ferment into kombucha, but once your scoby is going strong, you can try branching out into other kinds. Green tea, white tea, oolong tea, or a even mix of these make especially good kombucha. Herbal teas are ok, but be sure to use at least a few bags of black tea in the mix to make sure the scoby is getting all the nutrients it needs. Avoid any teas that contain oils, like earl grey or flavored teas.
• Avoid Prolonged Contact with Metal: Using metal utensils is generally fine, but avoid fermenting or bottling the kombucha in anything that brings them into contact with metal. Metals, especially reactive metals like aluminum, can give the kombucha a metallic flavor and weaken the scoby over time.
Troubleshooting Kombucha
• It is normal for the scoby to float on the top, bottom, or sideways in the jar. It is also normal for brown strings to form below the scoby or to collect on the bottom. If your scoby develops a hole, bumps, dried patches, darker brown patches, or clear jelly-like patches, it is still fine to use. Usually these are all indicative of changes in the environment of your kitchen and not a problem with the scoby itself.
• Kombucha will start off with a neutral aroma and then smell progressively more vinegary as brewing progresses. If it starts to smell cheesy, rotten, or otherwise unpleasant, this is a sign that something has gone wrong. If you see no signs of mold on the scoby, discard the liquid and begin again with fresh tea. If you do see signs of mold, discard both the scoby and the liquid and begin again with new ingredients.
• A scoby will last a very long time, but it’s not indestructible. If the scoby becomes black, that is a sign that it has passed its lifespan. If it develops green or black mold, it is has become infected. In both of these cases, throw away the scoby and begin again.
• To prolong the life and maintain the health of your scoby, stick to the ratio of sugar, tea, starter tea, and water outlined in the recipe. You should also peel off the bottom (oldest) layer every few batches. This can be discarded, composted, used to start a new batch of kombucha, or given to a friend to start their own.
• If you’re ever in doubt about whether there is a problem with your scoby, just continue brewing batches but discard the kombucha they make. If there’s a problem, it will get worse over time and become very apparent. If it’s just a natural aspect of the scoby, then it will stay consistent from batch to batch and the kombucha is fine for drinking.
Brewing Kombucha Safely
And while the homebrewed nature of kombucha makes some home cooks nervous, is unlikely that kombucha will ever make you sick. Like all things, you need to use common sense when brewing it and pay attention to what you’re doing. It’s natural to feel nervous and unsure at first. Bottom line: if the scoby is healthy, then the kombucha will be healthy.
Is There Alcohol in Kombucha?
Kombucha does contain a little bit of alcohol as a by-product of the fermentation process. It is usually no more than 1%. Unless you drink a lot of it back to back, you won’t get drunk. But people with alcohol sensitivities should be aware of its presence.
I’m breaking the kombucha-making process into very small steps here. It looks long and complicated, but this is actually a very straightforward and streamlined process. Once you get into the rhythm of it, bottling a finished batch of kombucha and preparing the next only takes about 20 minutes every 7 to 10 days.
Where to Find Kombucha Brewing Supplies
You can use regular, store-bought tea and sugar for brewing kombucha. You can pick up a scoby from a kombucha-brewing friend or even make your own. They are available online also, however give starting your own from scratch a go!
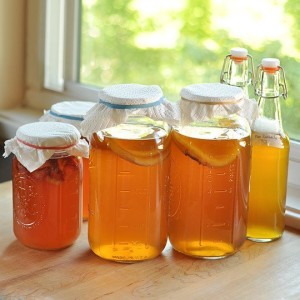
Have fun ! Take care of you, see you in the clinic,
TK xx
Learn more > http://www.tanyakeamwellness.com

 Hi, I’m Tanya, an Acupuncturist and Chinese medicine practitioner in Nambour on the Sunshine Coast, Queensland Australia. I practice Chinese medicine because its safe, logical, relevant and has effectively shown methods of natural wellness for thousands of years (read more about my training here). Life doesn’t need to be complicated and nor does the treatment approaches to get people feeling vibrant and well. I’ve seen people gain a lot from treatments, much more than just alleviating symptoms. It’s exciting to connect with people and share deep wisdom from the classics of ancient and traditional medicine, with modern protocols for todays mind-body living. See you in the clinic !


